Fabricating Mechanical Automatons
Midterm Project: The Fabled Automaton
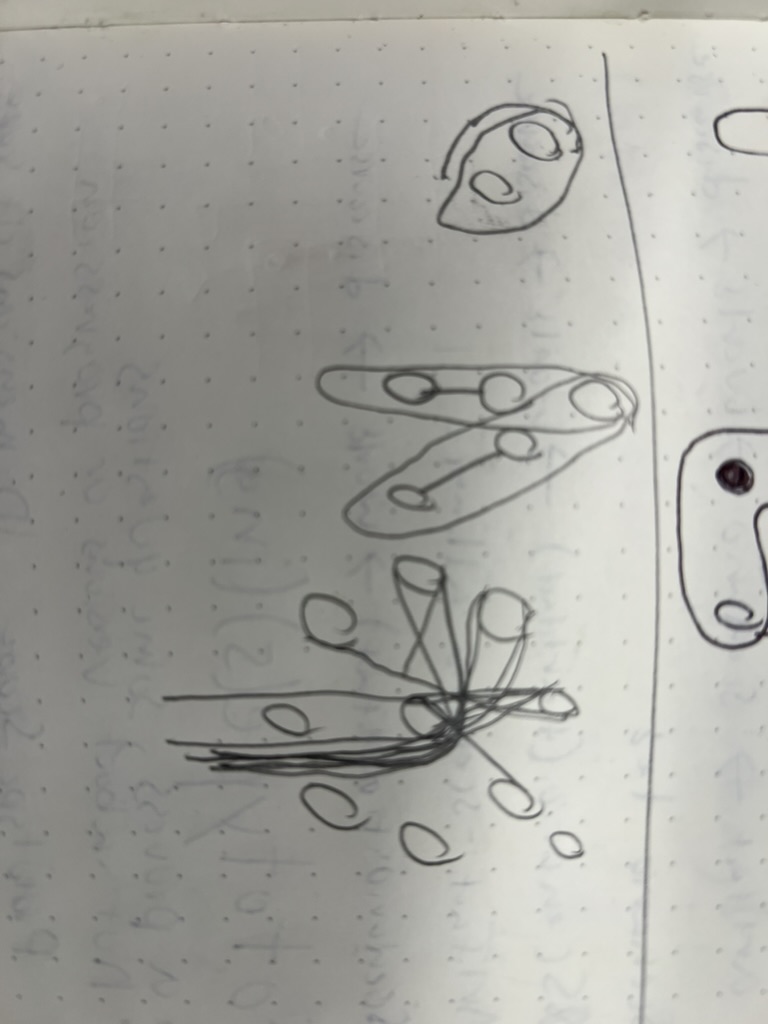
Ideation
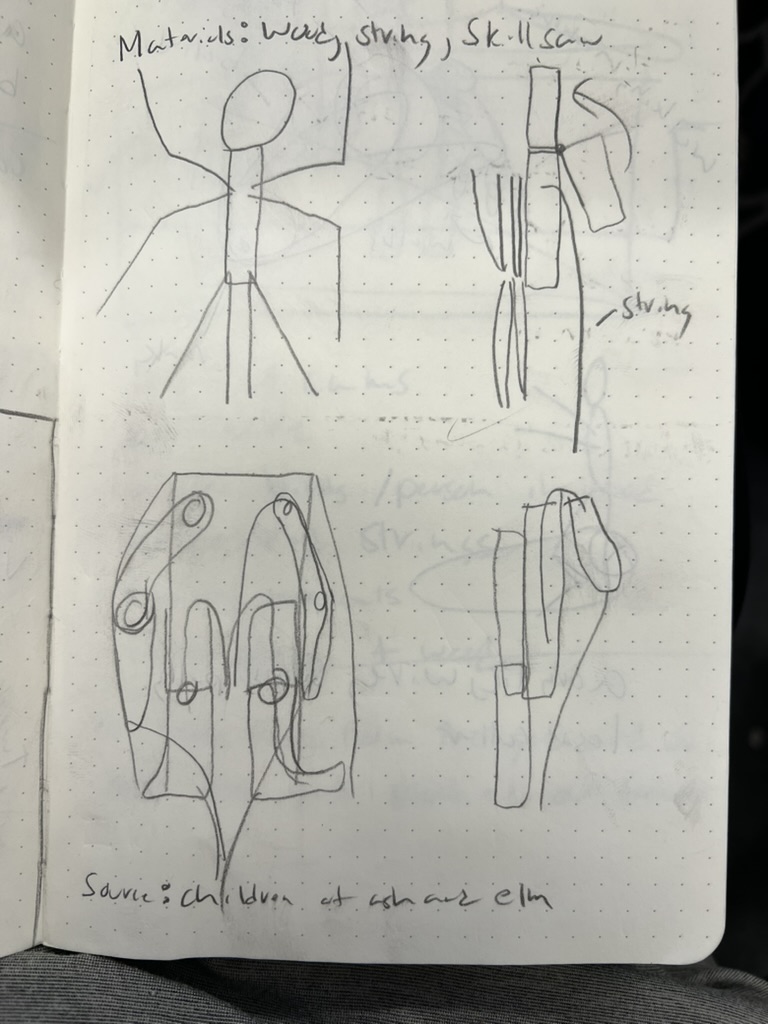
I chose to make a piece inspired by the Viking myth of the creation of mankind. Two people created in form from trees. I learned about this myth from my partner's Viking phase. I wanted to explore the form of the body and try some animation. A pull string automaton seemed like a good idea because of my previous success with the lasercut linkage I made in the last project. [link and document this here]. Without digital tools, I needed to work the mechanism out on paper and with cardboard first before moving to CAD and higher levels of fidelity. Learning to work with cardboard prototypes was a theme of this semester and something I am new at. to working with speed while moving to form.
Prototyping
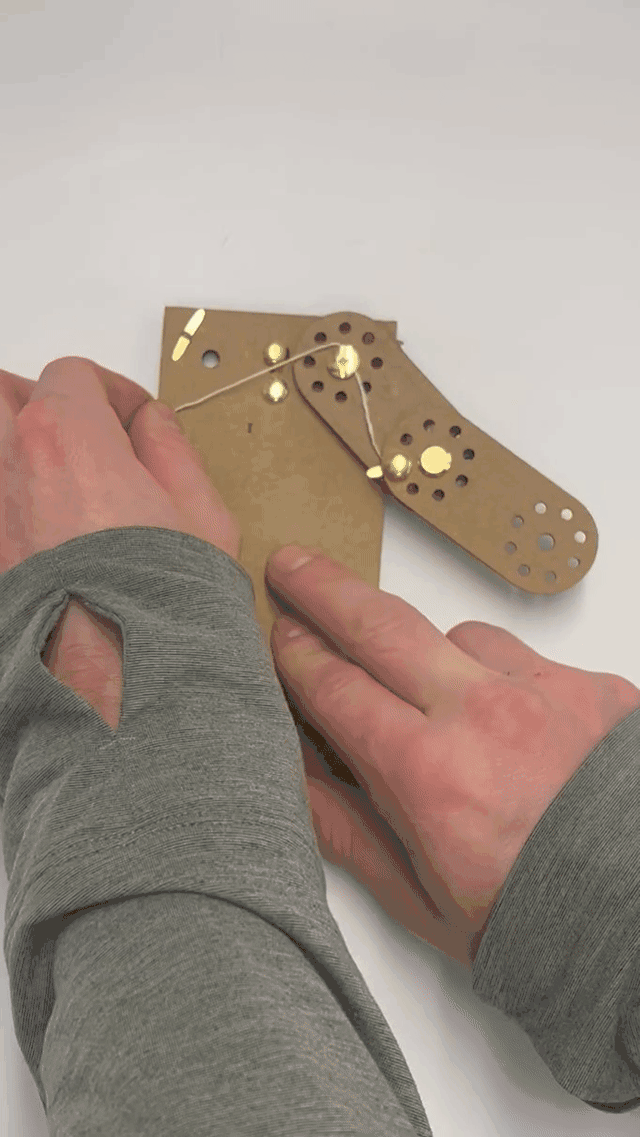
I did some versions in cardboard.
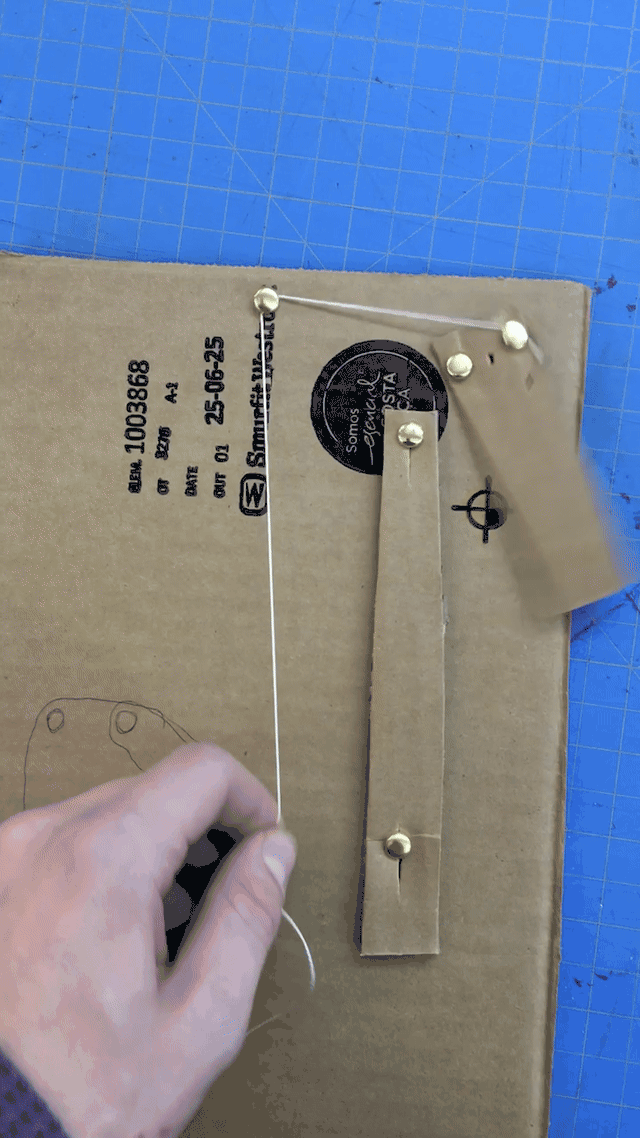
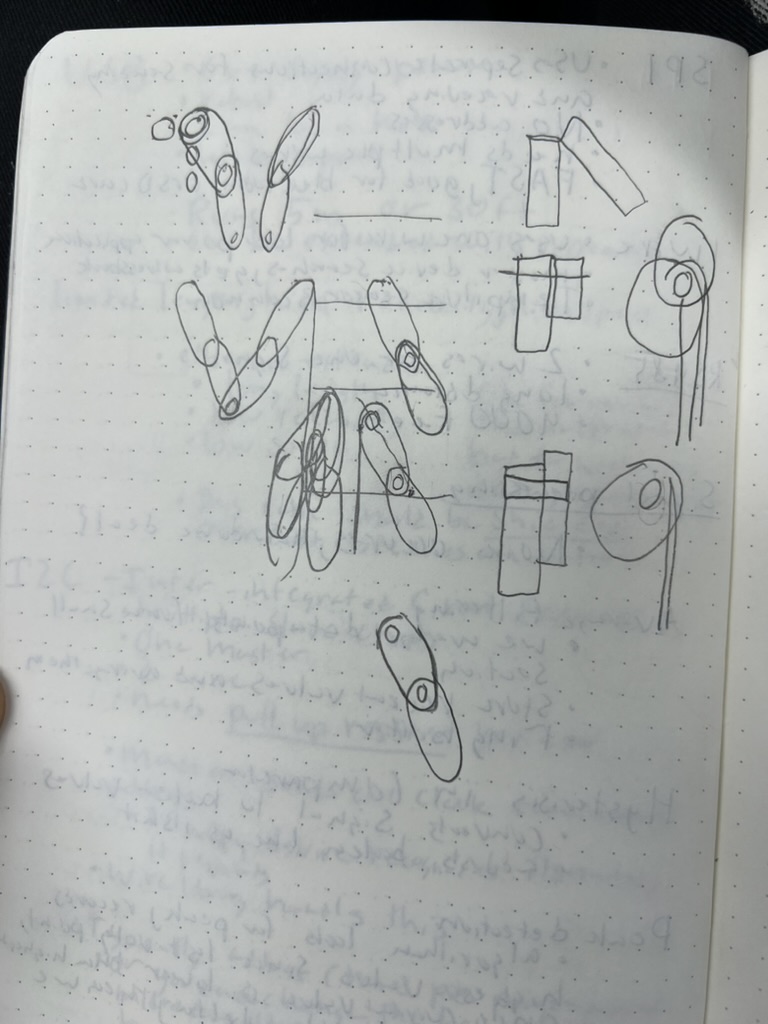
This single linkage helped me think about the first rotation. The point of termination for the string pulls towards where its pulley is.
The double linkage follows the same rules. The second linkage pulls towards where the first terminated. I included a stop to prevent overextension in the first linkage. These two prototypes excelled because they had a large lever arm where the string pulled against and thus had a mechanical advantage.
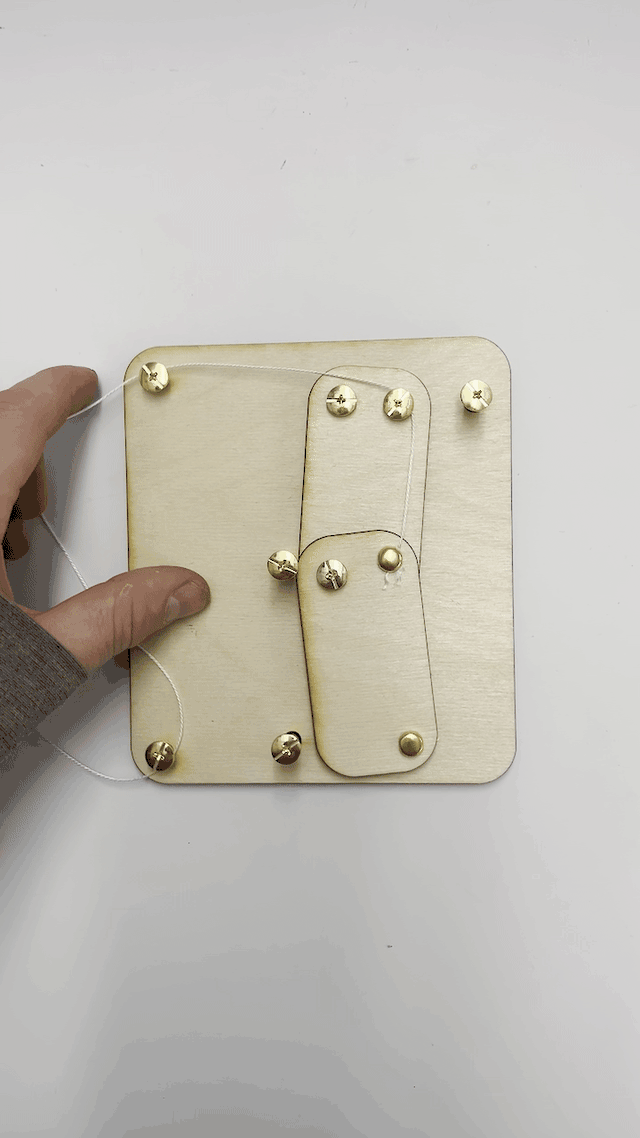
I wanted to have my two figurines extend their arms out to each other and hold hands. Feeling confident with this double linkage, I moved into higher fidelity with laser-cut wood. Ultimately it was too early and I went back to cardboard. I needed a better way to block the movement of the first linkage. This was the beginning of my use of Fusion 360. From here, I iterated in the same file.
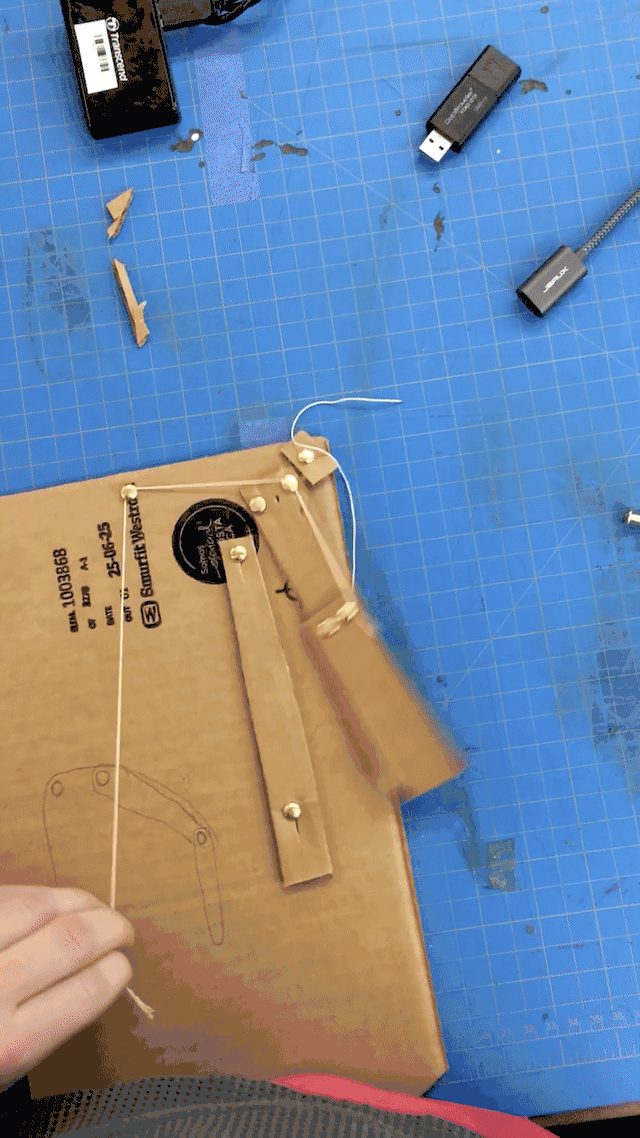
I totally forgot how the movement worked when I filmed this, but this format helped me think about where the pivot points should be.
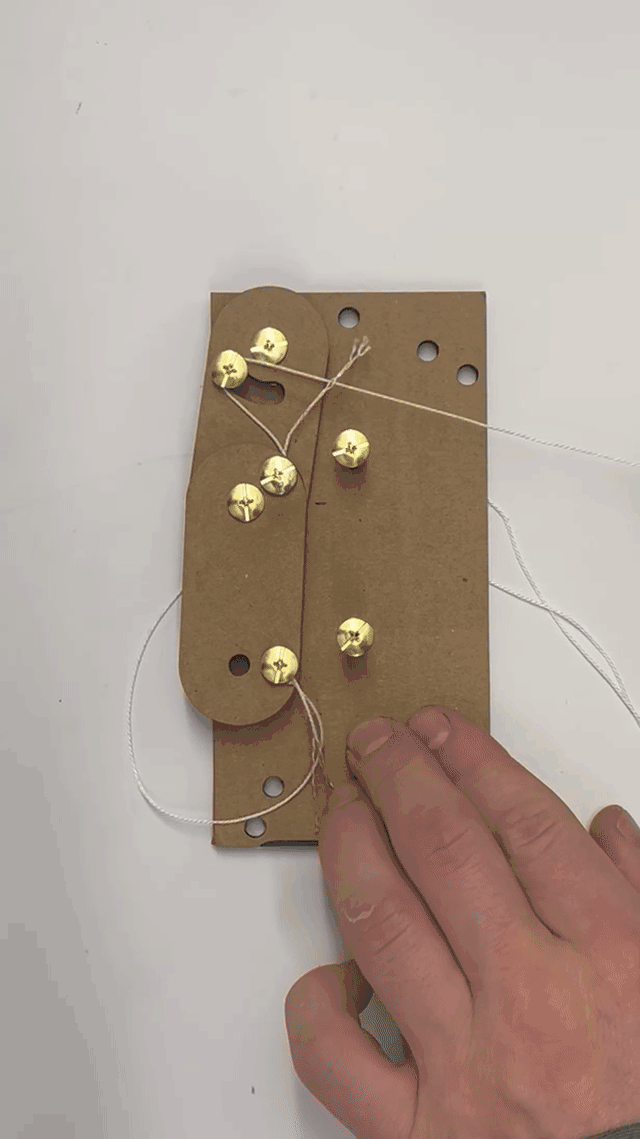
Creating a slot to constrain the rotation of the first linkage allowed me to control the movement while keeping the mechanism compact. I attached a string to a position where I thought would be good to pull from to reset the arm back into an unarticulated position.
First Assembly
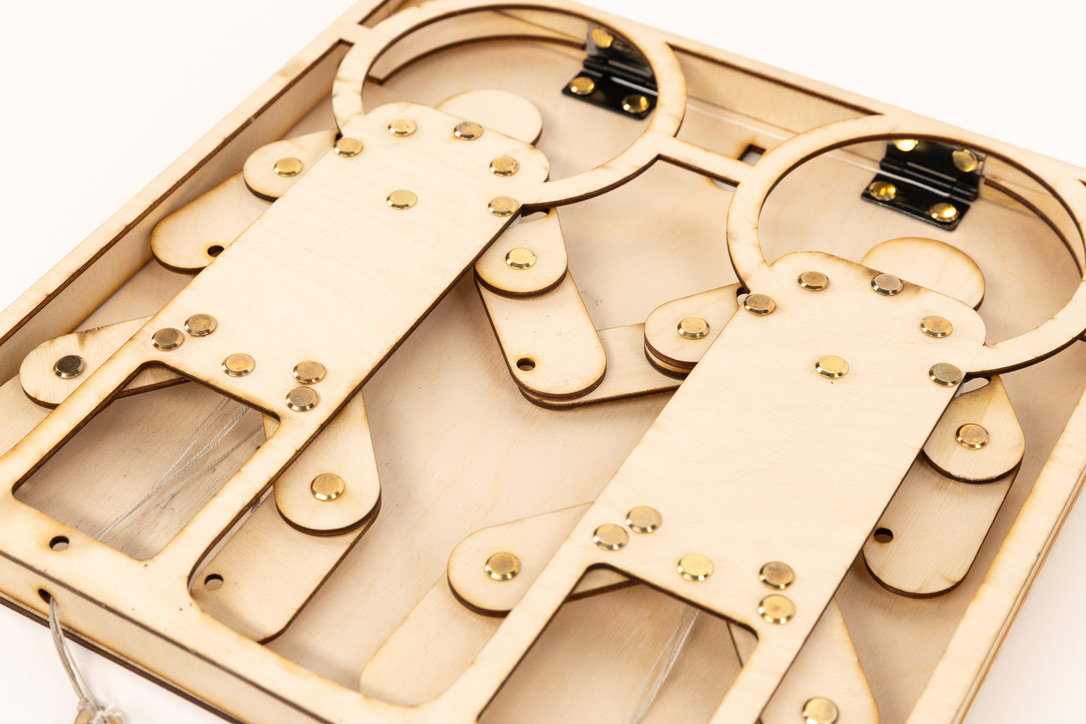
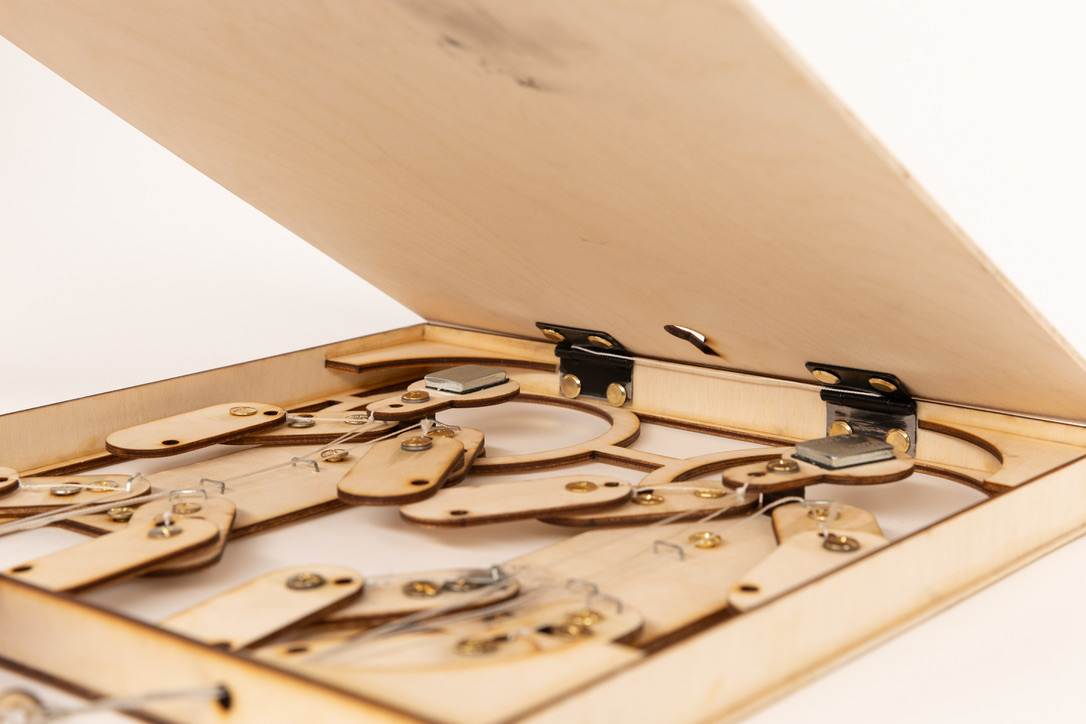
Getting a nice prototype done, I moved way too excitedly into multiplying the mechanism by 8 and cutting a full assembly.
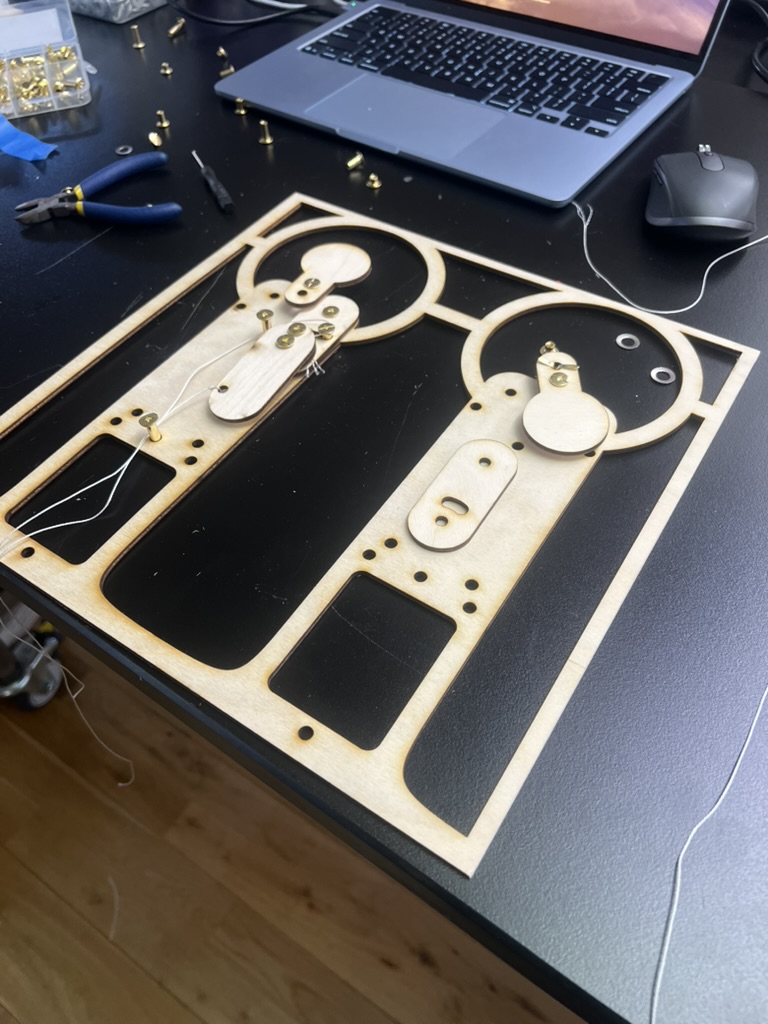
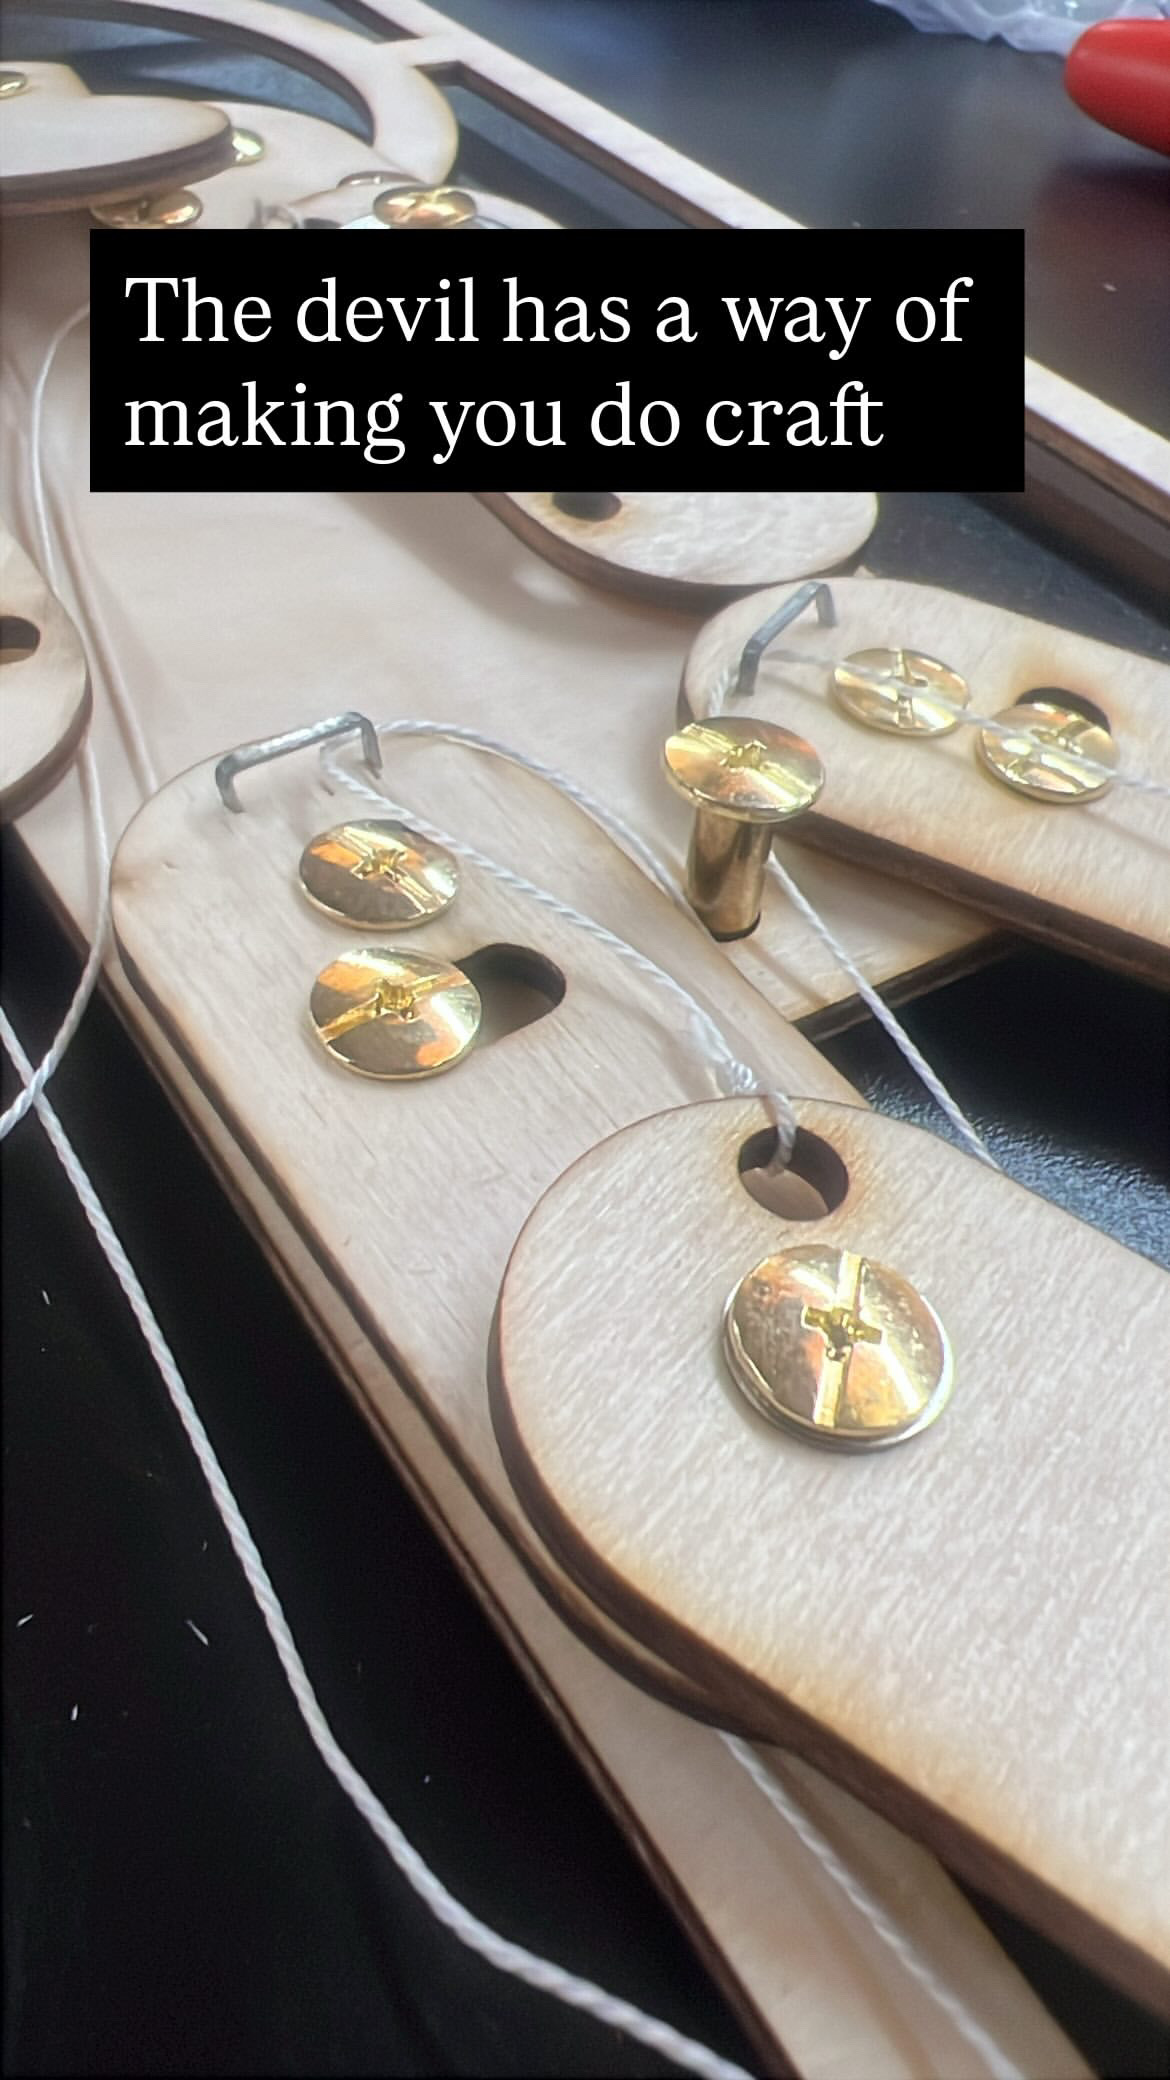
This part turned into a whole different type of struggle. I did not realize the amount of precision required to create the stack which could reliably move back into the hidden position. In the previous tests, the cardboard had been at the right depth and softness that my Chicago screws had very little play. The hard wood meant that the .5mm in variance they have in length and sloped contact point meant that they were difficult to shim and keep closed. It was too late to change it, I needed something to show, so I put it together with random nuts from the junk nuts cabinet and hoped for the best. From this version, if I carefully reset it, I was able to get one good pull.
When I put this together I was so tired I forgot to put the strings in the right place for the arms to pop out easily. Overall, it was a disaster and a real learning moment. I had been caught with my pants down on a physical build and was stuck with sub-quality work.
Critique
I presented from my camera roll and Fusion 360 file. Josh and Sinclair both agreed that I should have done just one more round of prototyping and not gone into CAD so fast. If I had spent more time with the movement, I think I would have been better able to incorporate it. About halfway through assembly the night before, I felt like I had forgotten how it worked at all. I think I could have pivoted into a smaller, less complicated automaton if I had worked more incrementally and then produced smoother work I was more proud of.
Reassembly
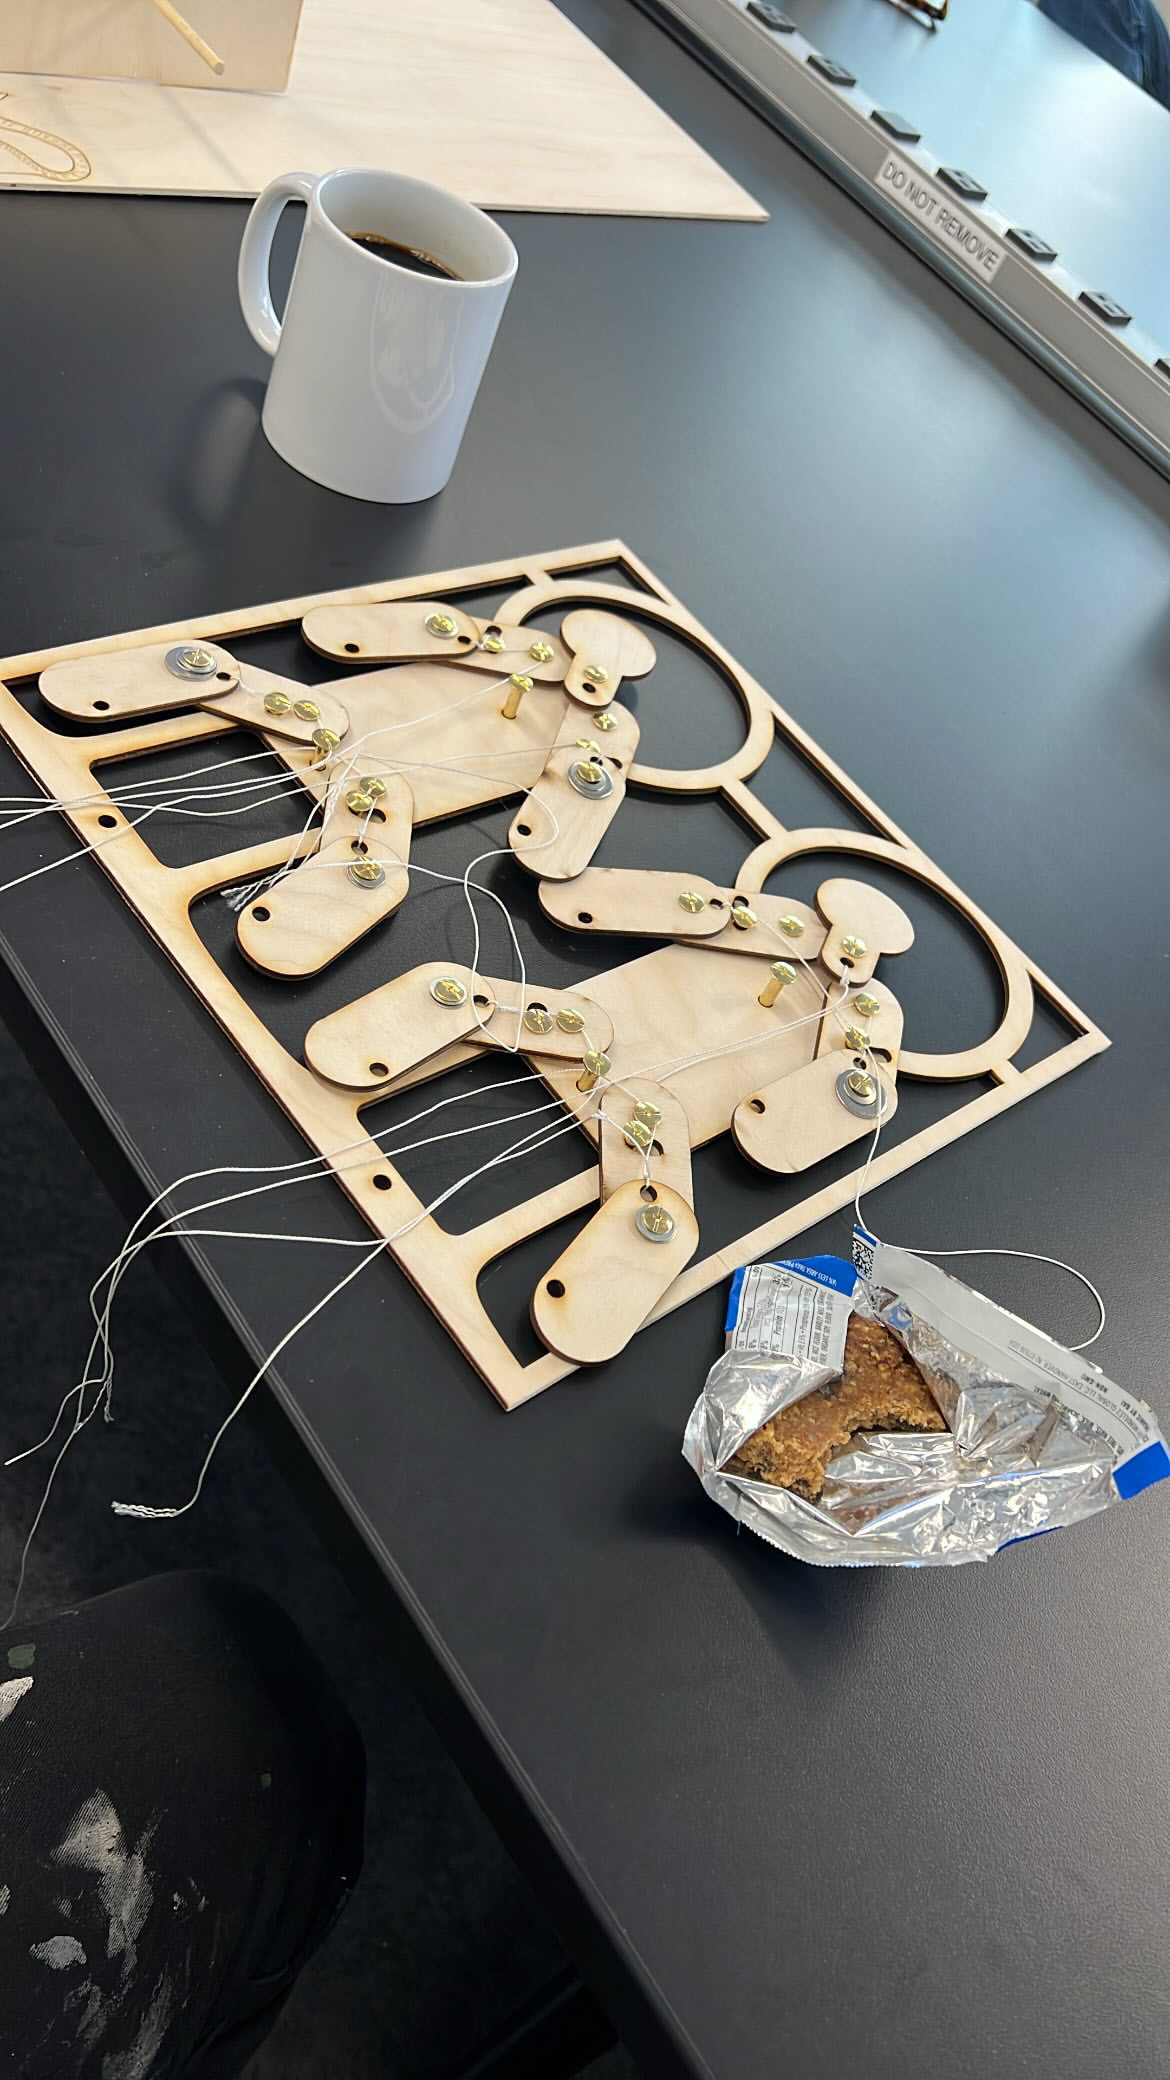
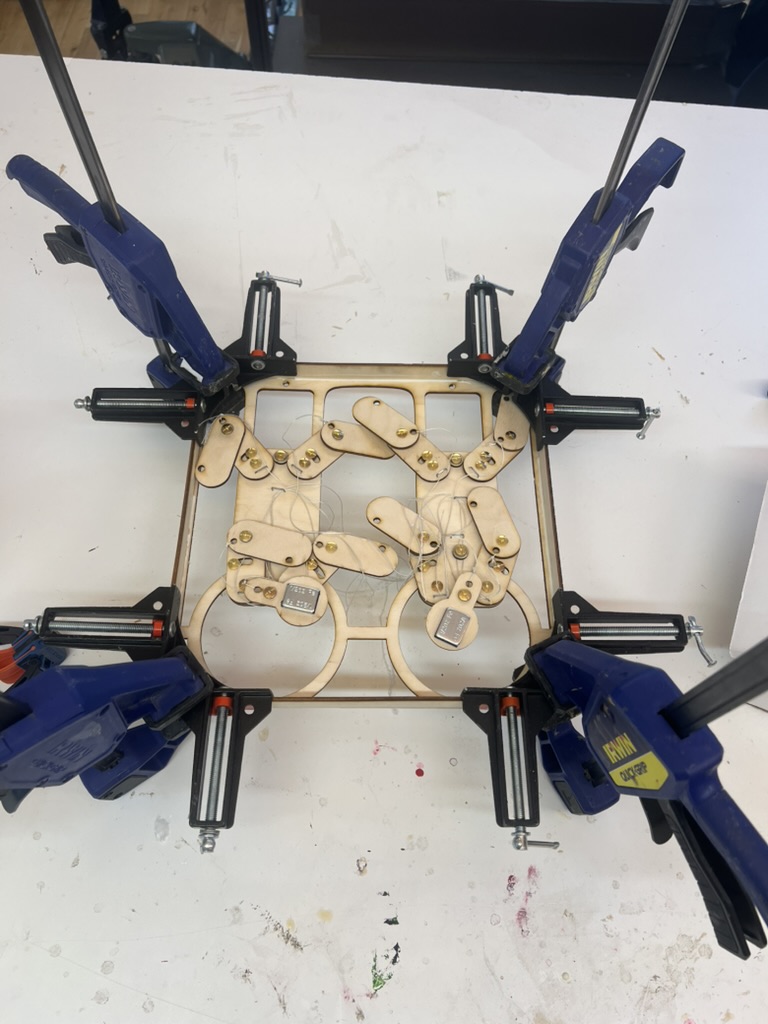
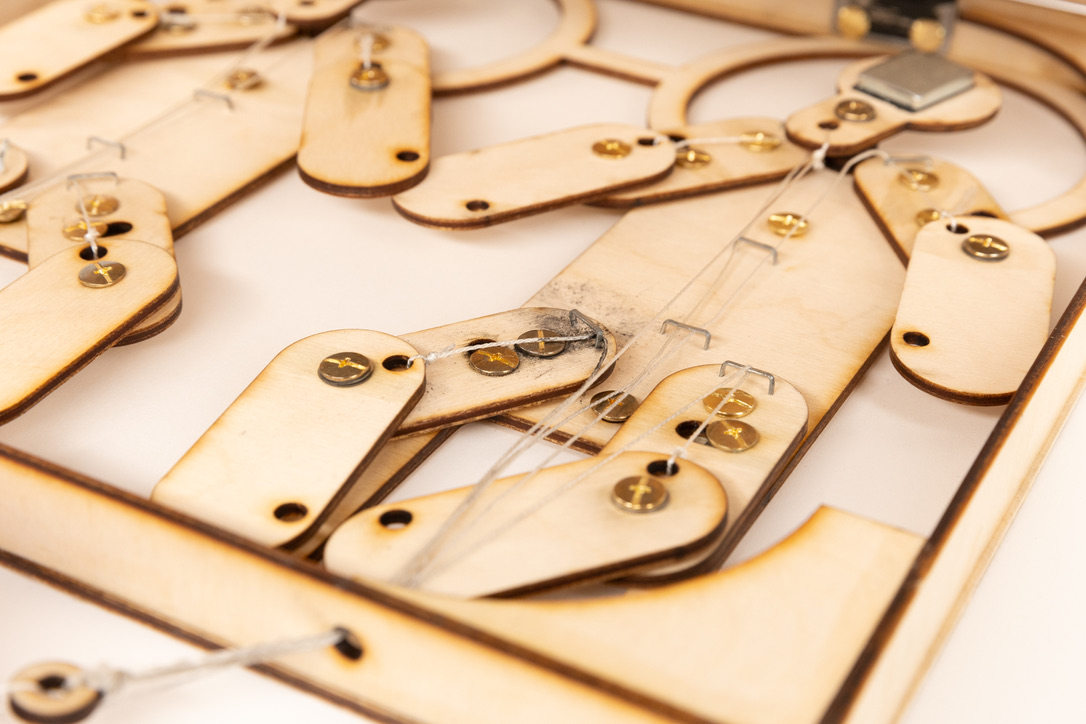
To finish the piece I spent time working through each pivot with .1, .2 and .5mm shims as well as Delrin washers. Slowly and methodically I massaged each joint, disassembling and reassembling it with a stack and a dab of Loctite. This was brutal because I once or twice applied too much Loctite and had to break open and replace the whole stack. Trying to account for low precision parts with high precision ones is a really killer and stupid move. I got it working about two weeks after it was due and only barely.
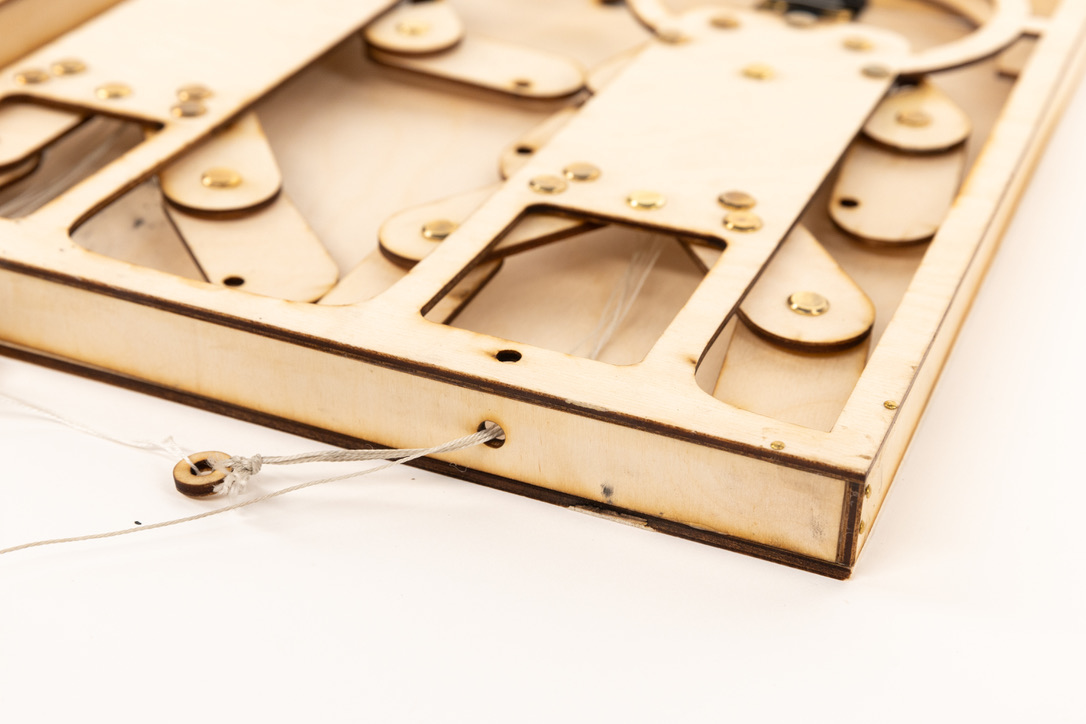
I also had to move the strings out and away from the pivot points to ensure smooth operation. Staples came in handy here and also let me increase my leverage a little bit. These turned out to be too sharp to run my strings over and later broke them on repeated use.
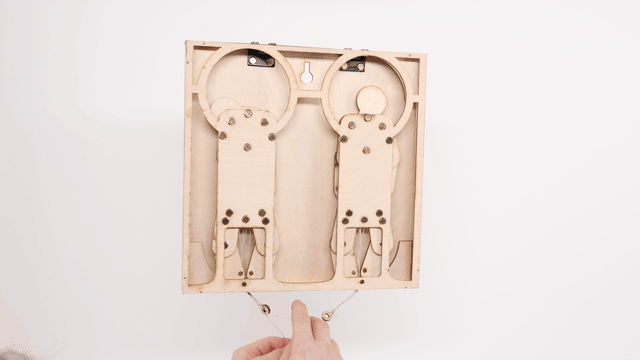
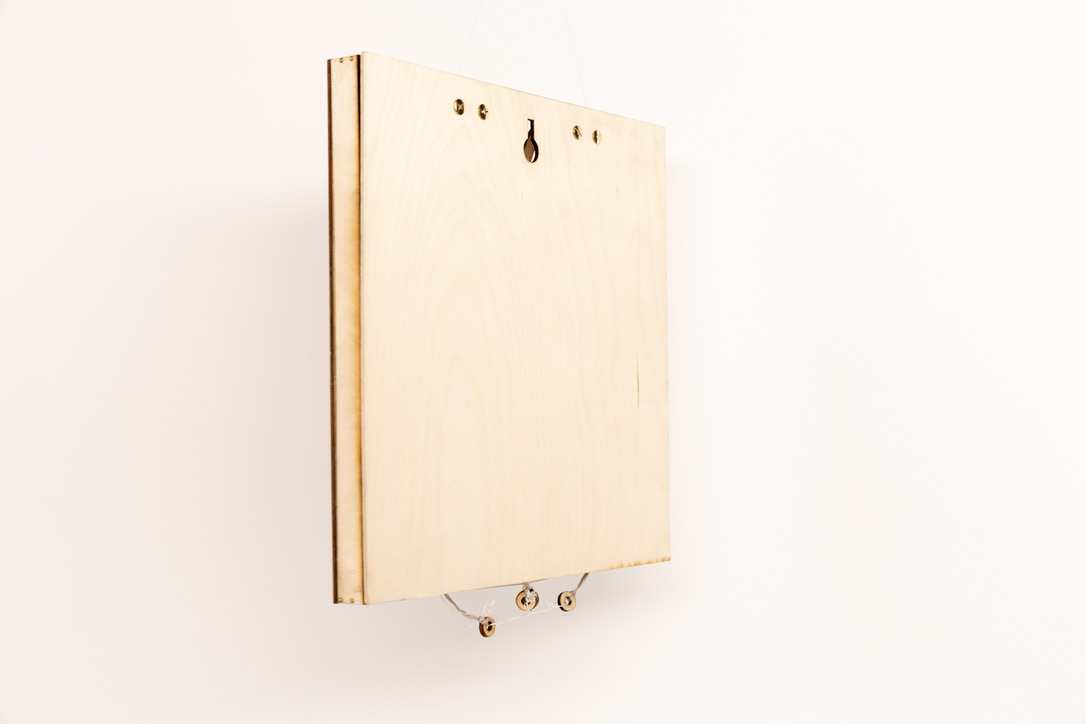
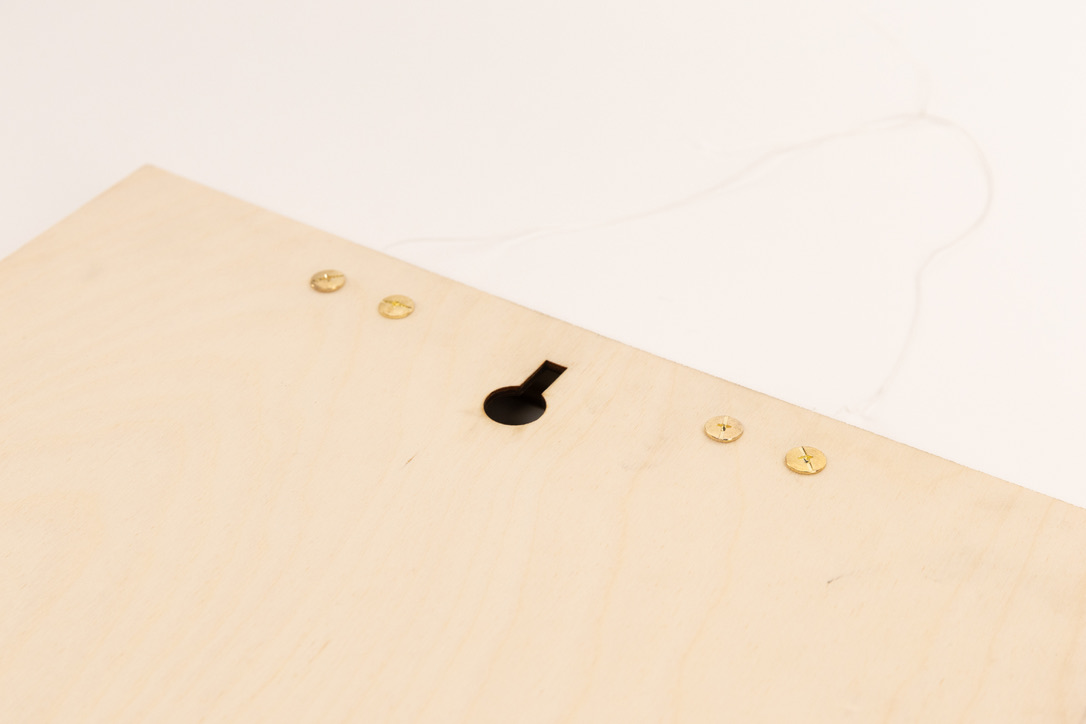
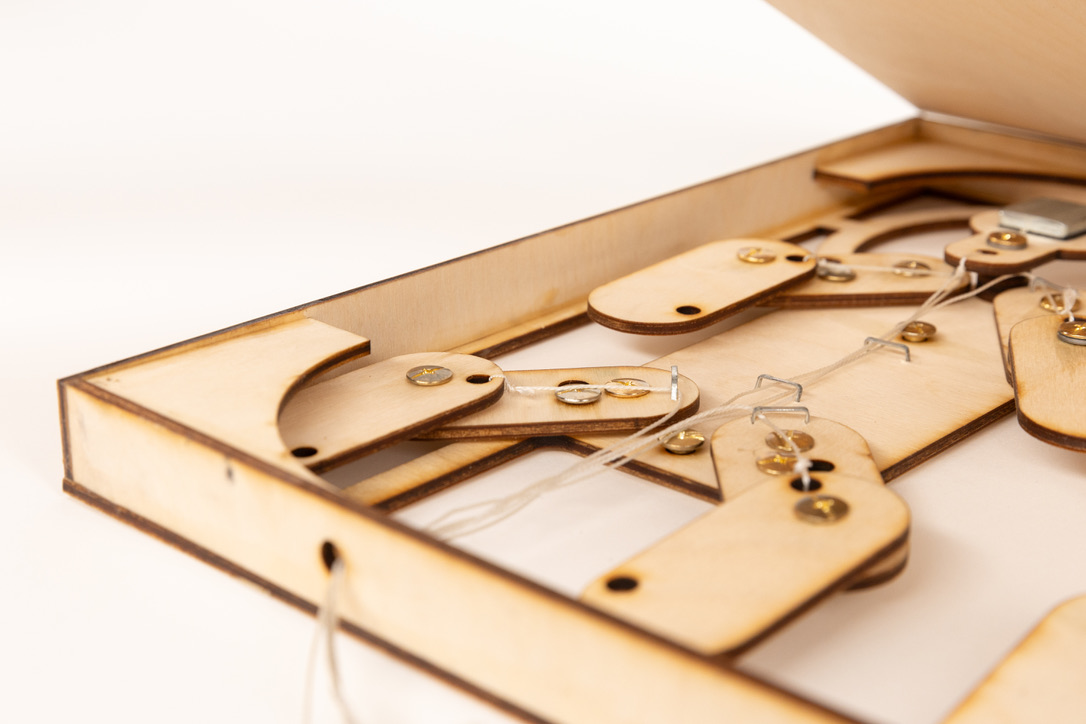
Finally, I glued the whole thing into a frame to give it some stability and a finished look. I needed it to hang on the wall so I could pull the string downwards to operate it. Something something, all the art in New York has to go onto a wall. I tried to wrap it up in a way which was both finished and authentically shit like the rest of the project. I knew a perfect one would require a total rebuild, so my goal was to bring it to a place where it looked tossed off and not something I spent like 6 weeks on and off obsessing over.
Documentation
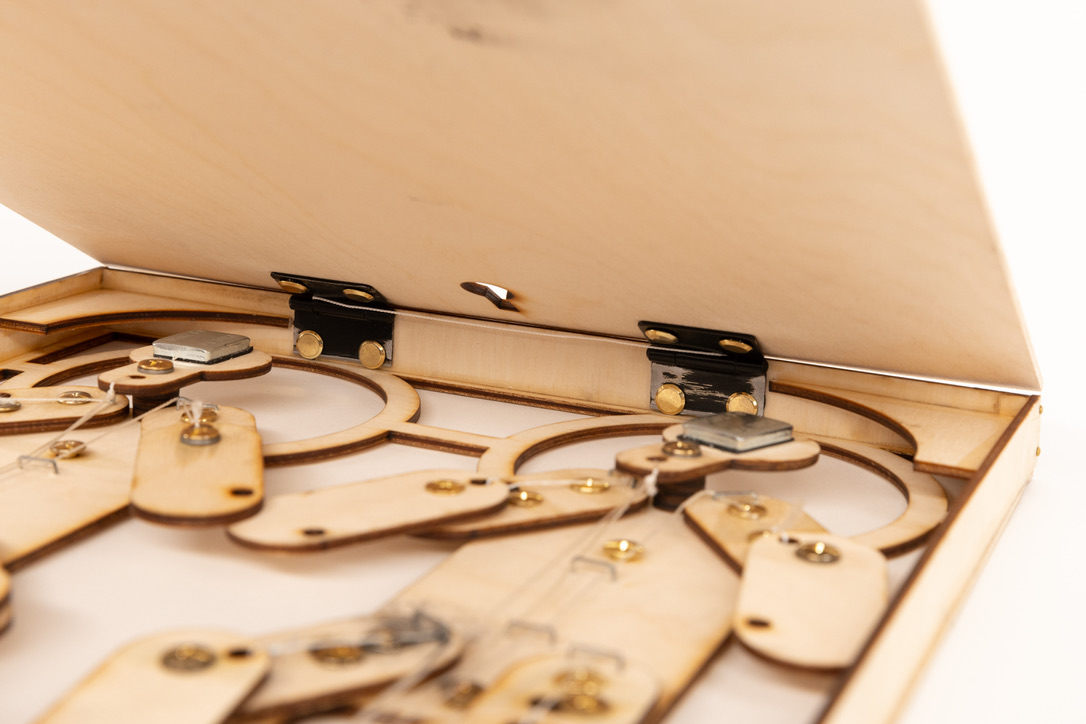
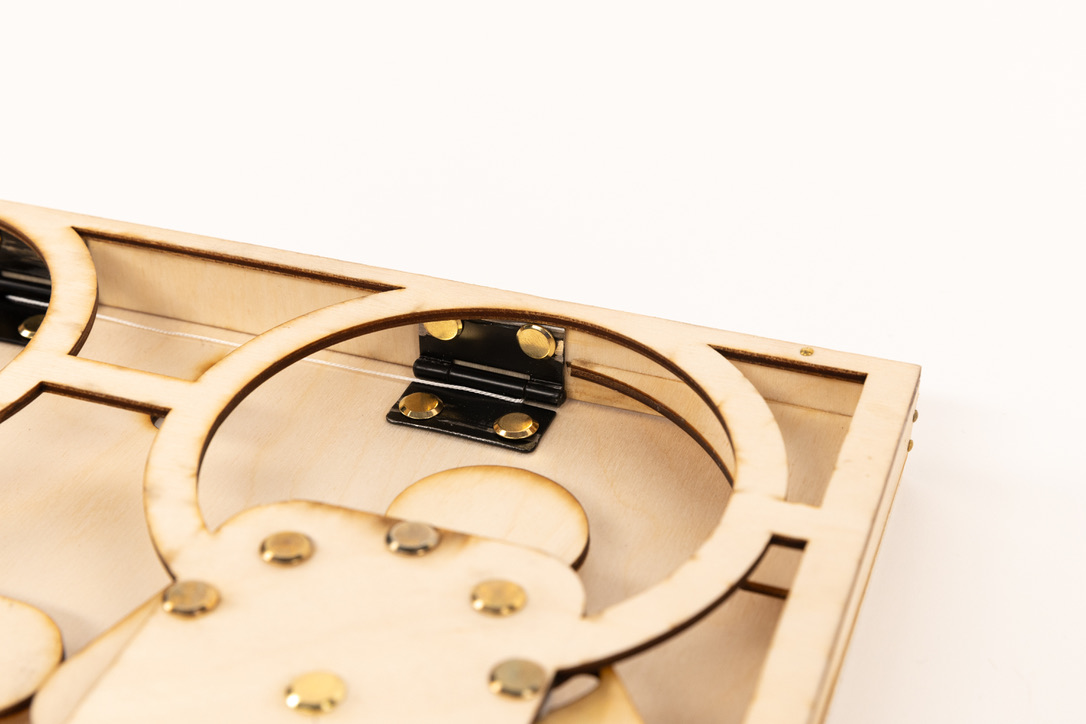
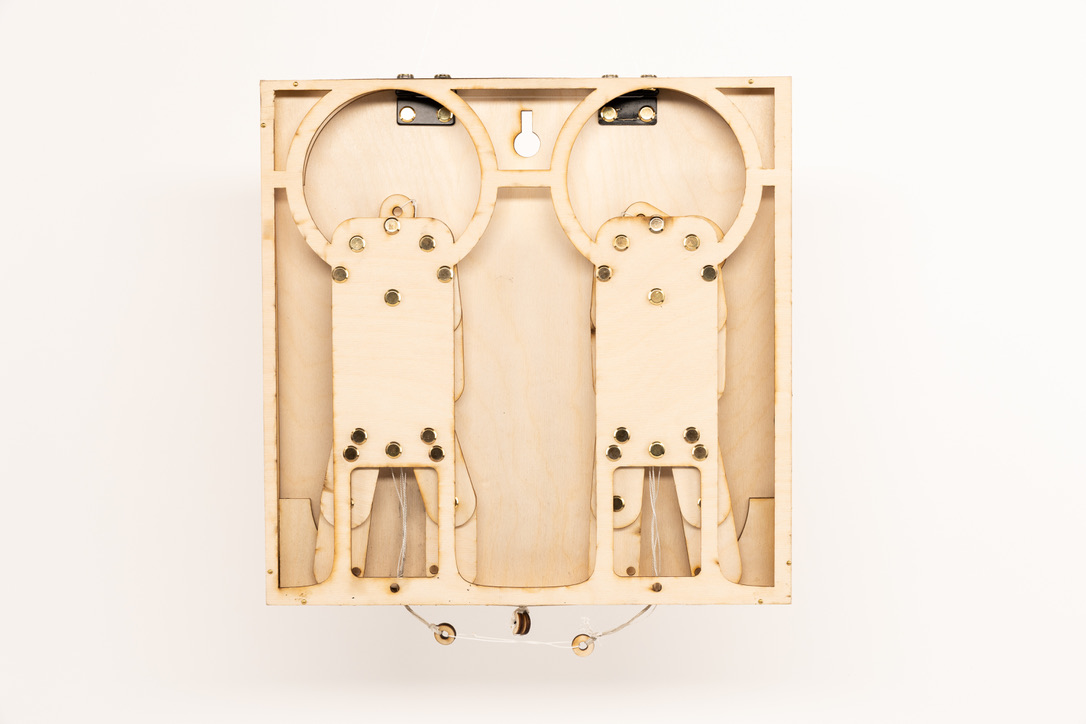
Some of my favorite details are the graphite stain where I tried to lubricate the joint and the black dust went everywhere. You can see some blue in there from the Loctite too. I put the hinge on backwards, and quickly tied up the bead pulls.
One more detail you can see here is the lead weight I attached to the head. This made its pull really satisfying, but the fact that it had a different amount of distance the rotation had to travel made it so that it was impossible to attach it straightforwardly to the rest of the strings. It had double the distance to travel. Solving this problem would require putting another loose bead on the pull string which allowed for some movement before it catches the rest of the strings and brings them taut.
One final point of suffering: I had to trim down the length of the hinges to fit the wood I had box I had cut. At this point it was mistake after mistake and each thing made the next thing worse.
Getting it photographed at the ITP doc lab felt so good. At this point, I was happy for it to just be done. Maybe inspiration will strike someday and I'll make another.